-40%
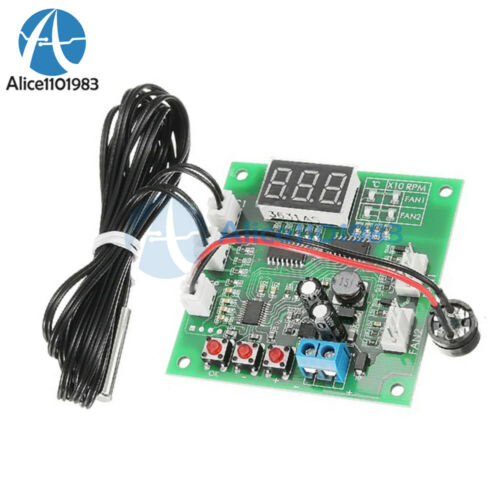
DC 12v 3a 2pin PWM PC CPU Fan Temperature Control Thermostat Speed Controller
$ 4.75
- Description
- Size Guide
Description
2pin PWM Fan Temperature Thermostat Speed ControllerIncludes temperature probe • Ideal for Peltier Coolers & LED heatsinks
We primarily sell these for
Peltier cooler chip applications
; this is also perfect for DIY or repair of LED or laser heatsinks.
We also have this chip for
4-wire CPU fans available here
.
Automagically control 2-pin CPU fan speed with this nifty chip. This version of the controller is for fans that do not have a built in PWM control wire. Use for fans that have a plug with either 2 or 3 connectors (the third would usually be a yellow wire for Tachometer output, your fan may or may not have it, and this chip will work equally with either (you can plug 2 wire fan plug into just 2 of the prongs on this module).
Use the included temperature probe to program fan speed based on your heatsink temperature, or use in manual mode to toggle between speeds.
Perfect for DIY or repair of LED heatsinks and Peltier cooler chip heatsink fans. Reduce fan speed when full speed is not necessary to eliminate noise and maximize fan life.
Operating voltage: DC12V can work in the range of 8-18V.
Current consumption: no more than 20mA
Fan interface: 2510-4P missing a bend (computer 4P fan dedicated interface)
Fan current: interface can withstand 3A, if you need to control the larger current fan, bypass power to fan
PWM output range: 10% -100
Operating temperature: -20 ℃ to 60 ℃
Temperature probe parameters: NTC 50K B = 3950
Probe temperature: 120 ℃
Board size: 43mm * 18mm * 9mm (without extension of the interface), the fan interface out of 8mm
Set the parameters factory default: low speed 20%, acceleration temperature 30 ℃, acceleration width 5 ℃.
The controller is designed for "manual control" and "automatic temperature control" in combination with each other
1. Do not install the temperature probe for manual control: click / double-click (double-click the speed not too fast) key up / down position. Each time you change the gear, continue to run for 20 seconds is automatically stored stalls, in 20 seconds, No. 2 indicator light will flash rapidly (at this time temperature control is invalid), when the stop flash after that has been stored stalls. The 3/1 indicator will light when the position can not be increased / can not continue to decrease.
2. When the temperature probe is installed, the speed of the manual speed is the initial low speed (bottom line speed). When the temperature exceeds the acceleration temperature, the fan speed increases smoothly with the temperature rise. When the temperature reaches and exceeds the acceleration temperature and acceleration width of the sum (that is, full speed), the fan at full speed. Set the acceleration temperature and the acceleration width parameters see the following setting diagram, Figure 1 2 3 number on behalf of the board indicator light (red), off (white) state in binary order.
Normal operation: Click the key to increase the output of the bottom line 5%, double-click the key to reduce the output of the bottom line 5%, change the value after running 20 seconds, until the middle of the light to stop flashing automatically save the parameters. Press the long press button to enter the temperature control setting.
Temperature control setting status:
Accelerated temperature setting (slow flash) by clicking double click to set the value respectively, long press to enter the acceleration width setting.
Accelerated width setting (flash) Also click double-click to change the value long press save and exit the temperature setting.
Note: If the setting is 20 seconds without operation, the setting will be automatically exited and the parameter will not be saved.
Example: The bottom line is 20%, the acceleration temperature is 35 ℃ and the acceleration width is 15 ℃. When the probe temperature is lower than 35 ℃, the output signal is always 20%. When the probe temperature exceeds 35 ℃, the controller increases smoothly according to the temperature rise Output signal, fan acceleration; when the probe temperature reaches or exceeds 50 ℃ (35 +15), the controller output full-speed signal, fan full speed. Specific to the actual speed of the fan, according to the specific performance of the fan will be slightly different.
The controller has been supported on the anti-timing fan control, the specific setting method:
First power off and remove the fan, press and hold the set button to power the controller, keep the set button always hold down (about 3 seconds), until the three lights at the same time into a double flashing state after the release button, the indicator light into a single Lights double flash, that is, to enter the mode set state. The controller is divided into three working modes, corresponding to 1,2,3 lights double flash, by short press the button to switch, set long press and hold the button to save and exit the setting mode and automatically return to normal working condition. Three working modes are:
1. Conventional PWM fan control mode (default mode) for standard Intel standard 4-wire fan control.
2. Conventional anti-timing PWM fan control mode for most of the anti-timing four-wire fan control, these fans in the conventional mode control when the speed change the opposite, and the control line is negative when the full speed.
3. Anti-timing fan 80% control mode, for a very rare anti-timing fan, this fan in the conventional mode control the speed change the opposite, and the control line does not turn negative.
Note: The fan control line and the speed line can not be connected to the power supply positive!


